No-knead bread has become a beloved staple for home bakers of all skill levels. This recipe offers a foolproof way to bake crusty, artisan-style bread without the hassle of kneading or complicated techniques. It’s the ultimate solution for anyone who loves fresh, homemade bread but prefers a hands-off approach.
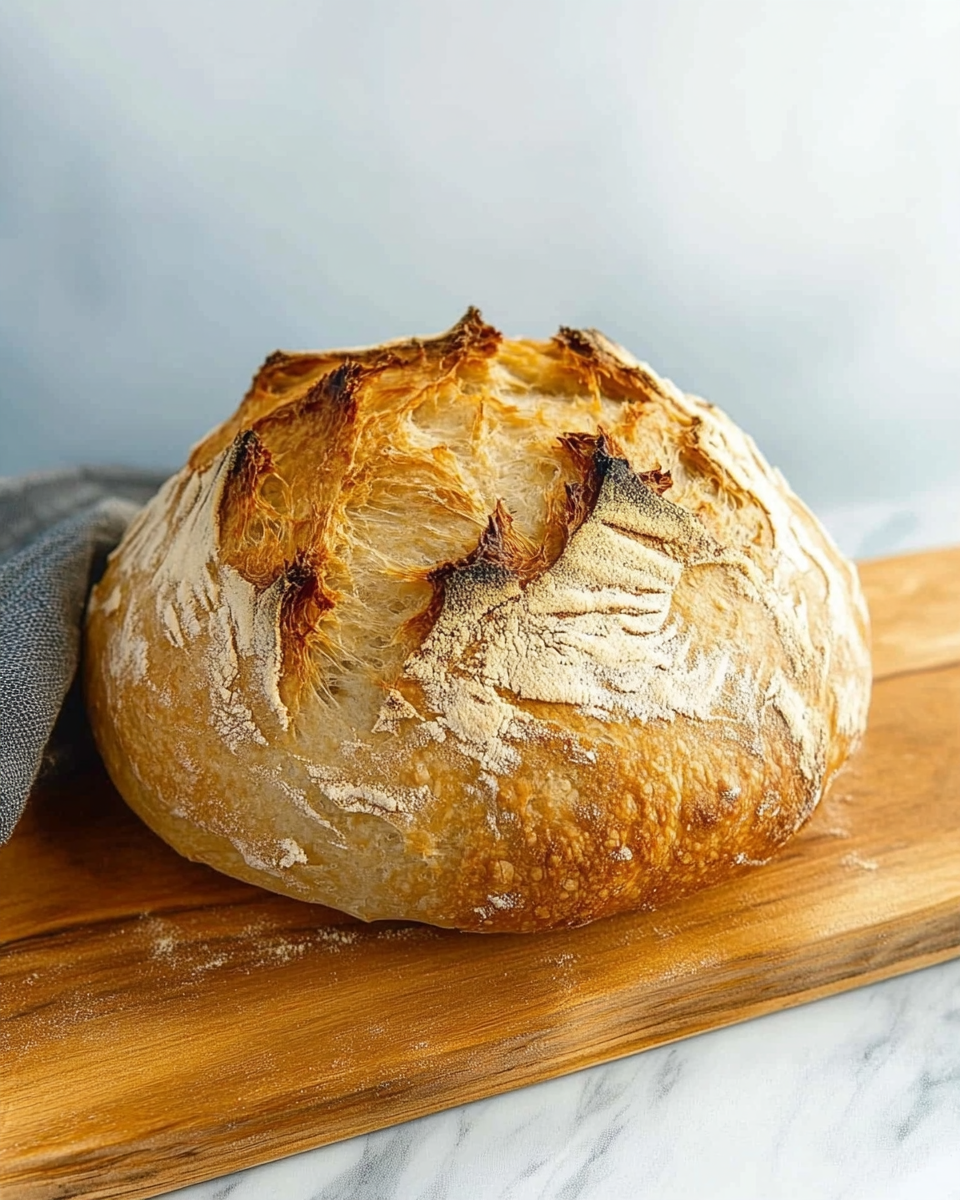
The concept of no-knead bread gained popularity thanks to its simplicity. By allowing a high-hydration dough to sit and develop gluten naturally, you achieve the same chewy texture and crisp crust found in bakery loaves — with minimal effort. In this guide, you’ll learn exactly how to make quick and easy no-knead bread with just a few basic ingredients and simple steps.
Unlike traditional bread recipes that require precise kneading techniques, this method relies on time and moisture to develop the dough’s structure. With only bread flour, yeast, salt, and water, you can create a flavorful, rustic loaf right in your own kitchen.
Why You’ll Love This Quick and Easy No-Knead Bread
This recipe checks all the boxes for convenience, flavor, and versatility. Here’s why it’s sure to become your go-to homemade bread:
- No special skills required — even beginner bakers can master this bread.
- Minimal ingredients — only four pantry staples needed.
- No kneading — the dough forms naturally with minimal handling.
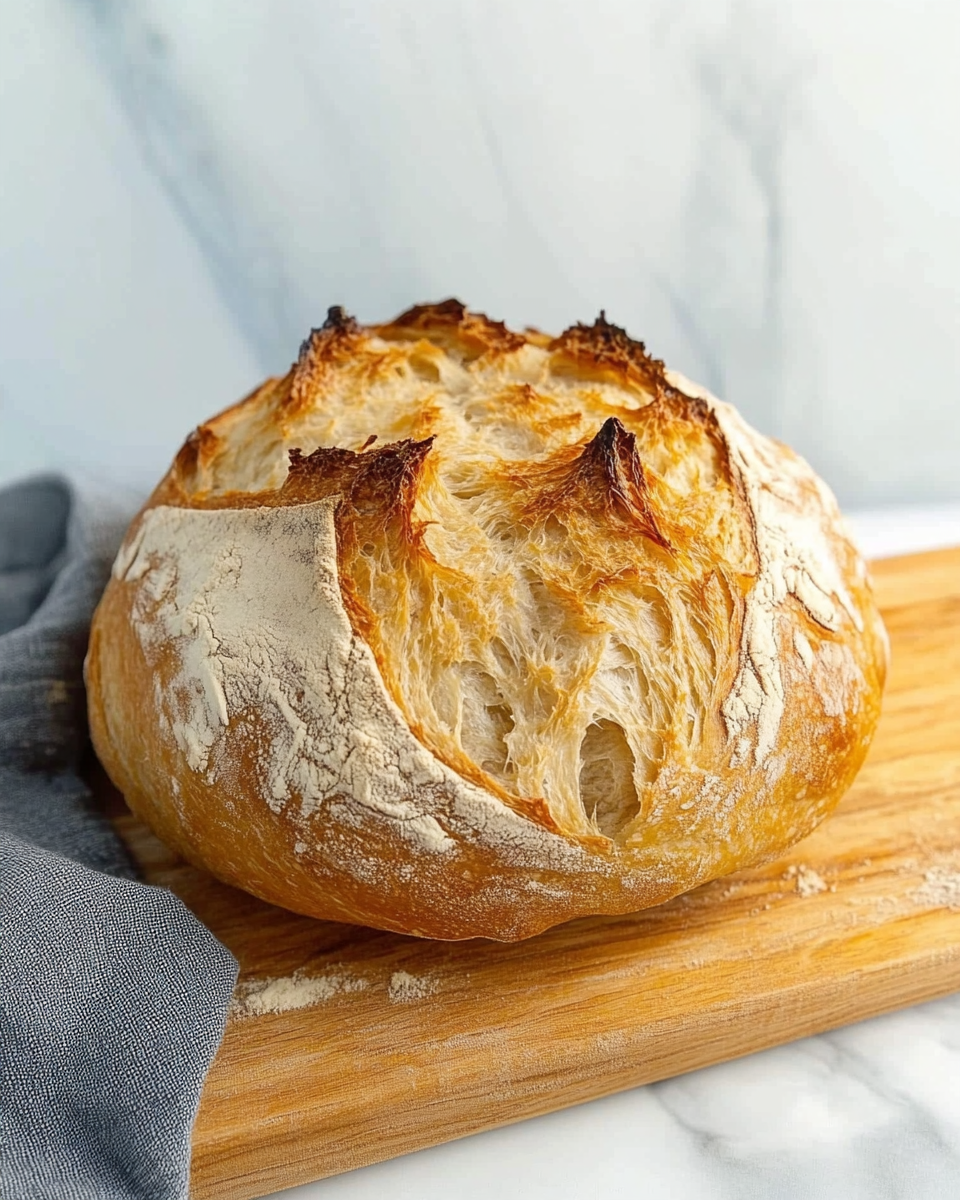
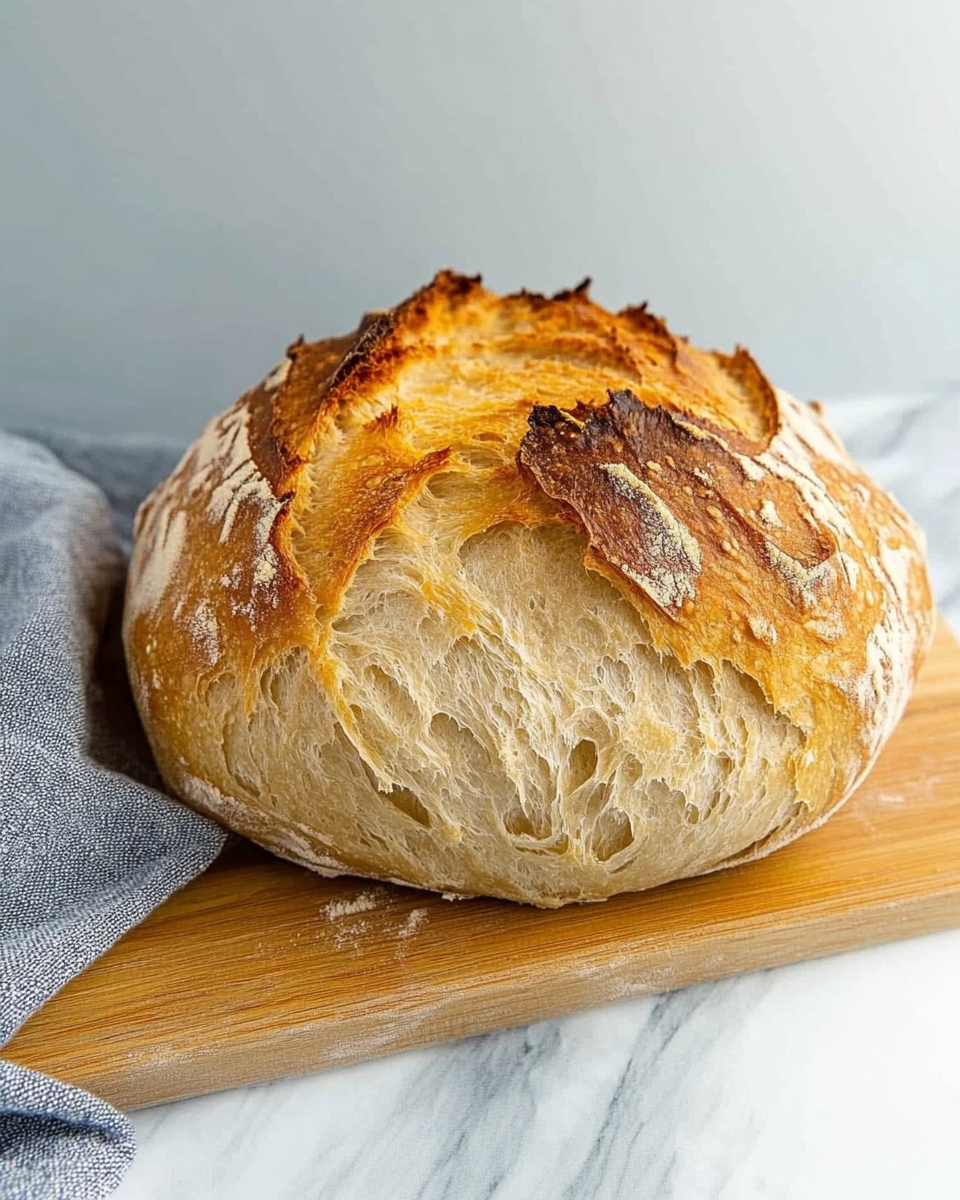
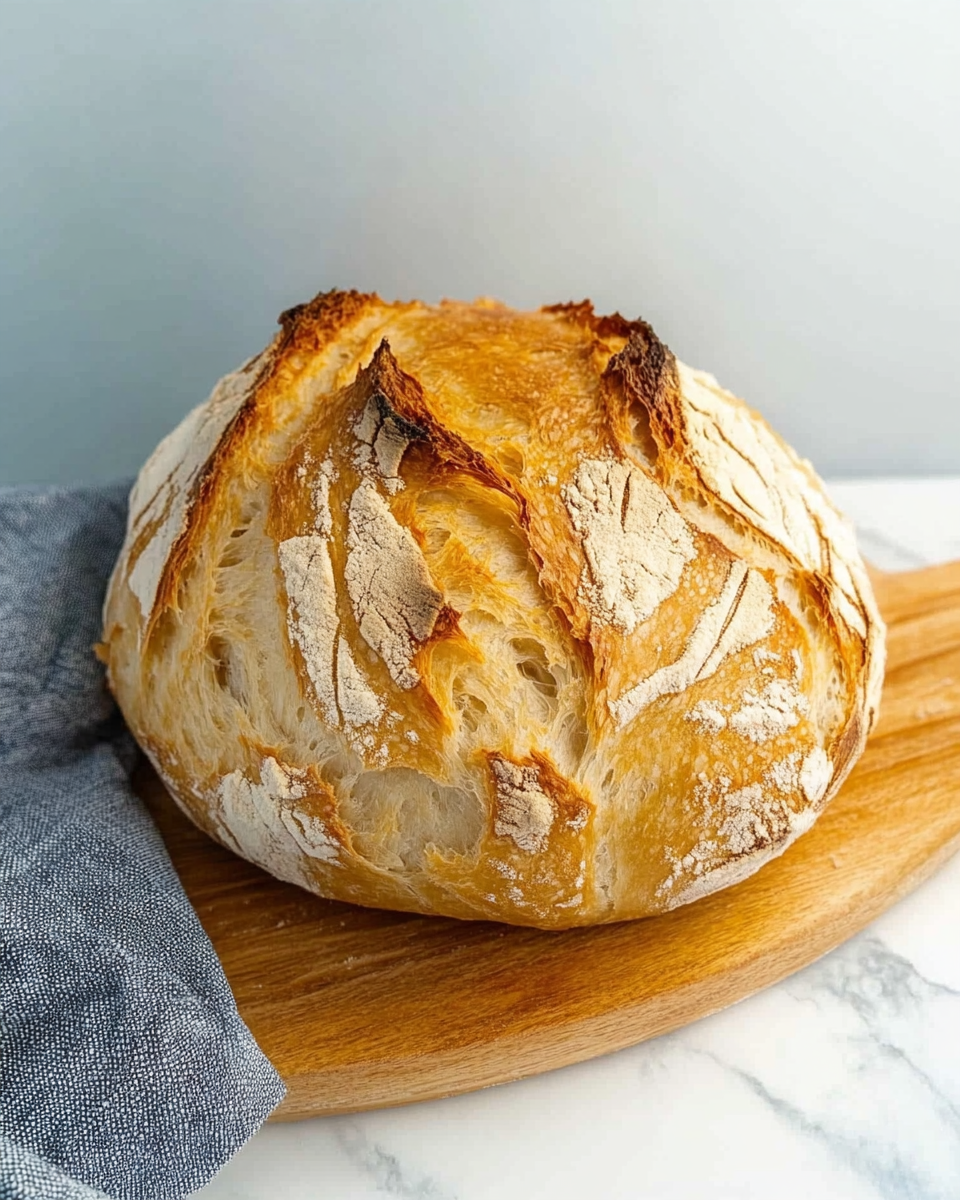
- Crusty exterior with a soft, chewy interior.
- Ready in just a few hours with rapid-rise yeast.
- Perfect for sandwiches, soups, or even as a standalone snack with butter.
- Highly customizable — add herbs, cheese, seeds, or olives for extra flavor.
Essential Tools and Equipment
Having the right equipment makes the process even easier. Here’s everything you need to make this quick and easy no-knead bread successfully:
- Mixing bowl – Large enough to allow the dough to double in size.
- Dutch oven with lid – Crucial for trapping steam during baking, which helps form the crisp crust.
- Wooden spoon or spatula – For mixing the dough without overhandling.
- Parchment paper – Prevents sticking and makes transferring the dough simple.
- Dough scraper (optional) – Useful for shaping and moving sticky dough.
If you don’t own a Dutch oven, you can substitute with a heavy oven-safe pot with a tight-fitting lid. Cast iron works best for heat retention, but any oven-safe option that can withstand 450°F will work.
Preparation Tips for Best Results
- Measure flour correctly – Use the spoon-and-level method to avoid compacting the flour.
- Use warm water – Water around 100°F to 110°F helps activate the yeast quickly.
- Don’t worry about sticky dough – A wetter dough creates better texture and air pockets.
- Allow enough rising time – A warm, draft-free environment ensures proper fermentation.
- Preheat the Dutch oven – A hot baking vessel is key for the perfect crust.
Ingredients List
This simple recipe uses just four core ingredients.
Basic Ingredients (Makes 1 Loaf, About 12 Slices)
- 3 cups bread flour
- 1 packet (2 teaspoons) rapid rise yeast
- 1 ½ teaspoons salt
- 1 ½ cups warm water
Optional Add-ins
- Fresh rosemary or thyme
- Shredded cheddar or parmesan
- Sesame or sunflower seeds
- Chopped olives or roasted garlic
Step-by-Step Directions
1. Mix the Dough
In a large mixing bowl, combine bread flour, rapid rise yeast, and salt. Add warm water and stir with a wooden spoon until a sticky dough forms. It will look shaggy — this is normal.
2. First Rise
Cover the bowl with a damp cloth. Place it in a draft-free area and let the dough rise for 2 to 3 hours, or until it has doubled in size.
3. Preheat the Oven
Preheat your oven to 450°F (232°C). Place your Dutch oven (with lid) inside to heat up while the oven preheats.
4. Shape the Dough
Lightly flour your countertop. Turn the dough out onto the floured surface. Gently fold the edges inward to form a round loaf. Avoid pressing down too much to preserve air pockets.
5. Prepare for Baking
Transfer the shaped dough onto a piece of parchment paper, leaving enough excess paper to easily lift the dough later.
6. Bake the Bread
Carefully remove the hot Dutch oven from the oven. Use the parchment paper to transfer the dough into the pot. Cover with the lid and bake for 30 minutes. Remove the lid and bake for another 15 minutes, or until the loaf is golden brown and crisp.
7. Cool and Serve
Use the parchment paper to lift the bread from the Dutch oven. Transfer to a wire rack and let cool completely before slicing.
Pro Tips and Variations
- For extra flavor, let the dough rise overnight in the refrigerator.
- Add minced garlic, fresh herbs, or cheese directly to the dough before shaping.
- Substitute up to 1 cup of bread flour with whole wheat flour for a heartier loaf.
- To check for doneness, tap the bottom of the loaf — it should sound hollow.
Serving Suggestions
Quick and Easy No-Knead Bread is one of the most versatile homemade breads you can make. Its crisp crust and chewy interior make it ideal for a wide range of meals, from simple breakfasts to elegant dinners. Whether you serve it warm straight from the oven or toasted the next day, this bread pairs beautifully with countless dishes.
Here are some delicious ways to serve and enjoy this bread:
- With Soups and Stews – Dip slices into creamy tomato soup, hearty vegetable stew, or a comforting bowl of potato leek soup. The sturdy texture holds up well when dipped.
- As Sandwich Bread – Slice thick for rustic sandwiches with grilled vegetables, fresh mozzarella, or classic ham and cheese.
- Topped with Butter or Olive Oil – Simple yet satisfying, a warm slice spread with salted butter or dipped in olive oil and balsamic vinegar makes a perfect snack.
- As a Bruschetta Base – Toast and top with tomatoes, basil, and garlic for a classic bruschetta, or experiment with goat cheese and roasted red peppers.
- Breakfast Toast – Top toasted slices with avocado, smoked salmon, or fruit preserves.
- Cheese Boards and Charcuterie – Offer sliced no-knead bread alongside cheeses, meats, and spreads for a stunning grazing board.
- Croutons and Crostini – Leftover slices can be cubed and toasted for hearty homemade croutons or brushed with olive oil and grilled into crostini.
This bread’s mild flavor and neutral profile make it the perfect complement to almost any cuisine. Its rustic appearance also adds a beautiful homemade touch to the table.
Common Mistakes to Avoid & How to Perfect Your Loaf
Even though this is a beginner-friendly recipe, a few common mistakes can affect the final result. Avoid these pitfalls to ensure your Quick and Easy No-Knead Bread comes out perfectly every time.
1. Adding Too Much Flour
The dough for no-knead bread is intentionally sticky. Adding too much flour to make it easier to handle will result in dense, dry bread. Lightly flour your hands and surface, but resist the urge to over-flour the dough itself.
2. Skipping the Preheated Dutch Oven
A properly preheated Dutch oven is key to achieving a crackly crust. Without that initial burst of heat and steam, the bread may bake up pale and soft.
3. Overproofing or Underproofing
The dough should double in size, but overproofing can cause the structure to collapse during baking. Underproofed dough results in tight, gummy bread. Keep an eye on the dough and adjust rise times based on your kitchen temperature.
4. Not Covering During the First Bake
The covered bake traps steam, which is essential for forming the crispy crust. Skipping this step will lead to a thicker, tougher crust.
5. Slicing Too Soon
Let the bread cool completely before slicing. Cutting into hot bread compresses the crumb and releases moisture, leaving you with gummy, uneven slices.
6. Using the Wrong Yeast
This recipe calls for rapid rise yeast, which works faster than active dry yeast. Using the wrong type without adjusting the process can affect rise times and texture.
7. Ignoring Dough Hydration
No-knead dough is highly hydrated, meaning it’s wetter than standard dough. This hydration helps develop the gluten structure and creates the characteristic airy crumb. Resist the temptation to “fix” the sticky dough.
8. Not Checking for Doneness
Even with the recommended bake times, ovens vary. A fully baked loaf should sound hollow when tapped on the bottom. If unsure, return the loaf to the oven for a few more minutes.
Side Dish Recommendations
Quick and Easy No-Knead Bread pairs well with a wide range of side dishes, from soups and salads to dips and spreads. Here are eight excellent pairings to round out your meal:
- Tomato Basil Soup – The acidity of tomatoes balances the bread’s subtle richness.
- Garlic Butter Shrimp – Use the bread to mop up the buttery garlic sauce.
- Caprese Salad – Pair with fresh tomatoes, basil, and mozzarella for a light, flavorful meal.
- Roasted Vegetables – Serve warm slices with a platter of roasted zucchini, bell peppers, and carrots.
- Creamy Mushroom Stew – Hearty and comforting, this stew complements the bread’s rustic texture.
- Spiced Lentil Soup – Earthy flavors contrast beautifully with the bread’s mild taste.
- Spinach Artichoke Dip – Spread this creamy dip on slices for an irresistible appetizer.
- Charcuterie Board – Offer the bread alongside cured meats, cheeses, olives, and fruit.
Recipe Tips and Tricks
Even though Quick and Easy No-Knead Bread is simple to make, a few small adjustments can elevate your results. These tips will help you achieve the perfect crust, crumb, and flavor every time.
- Use Bread Flour for Better Structure
Bread flour contains more protein than all-purpose flour, helping the dough develop stronger gluten. This results in a chewier, more structured loaf. - Don’t Skip the Preheat
Preheating your Dutch oven is crucial for oven spring — the rapid rise that happens in the first few minutes of baking. A hot baking vessel helps create steam, which is essential for a crackling crust. - Hydration Matters
The dough will feel wetter and stickier than traditional bread dough. This high hydration level creates the open crumb and irregular holes characteristic of artisan loaves. - Cool Completely Before Slicing
Let the bread cool on a wire rack for at least an hour after baking. This allows the crumb to set and ensures you get clean, even slices. - Experiment with Add-ins
Customize your loaf with fresh herbs, grated cheese, olives, or roasted garlic. Mix these in after the initial dough mixing step. - Use Cold Fermentation for More Flavor
For deeper flavor, allow the dough to rise overnight in the refrigerator. The slower fermentation enhances the bread’s complexity.
Storage and Reheating Instructions
Homemade bread lacks preservatives, so proper storage is key to maintaining freshness and texture. Here’s how to store and reheat your Quick and Easy No-Knead Bread for the best results.
Short-Term Storage
- Store the cooled loaf at room temperature for up to 3 days.
- Place the bread in a paper bag or wrap it loosely in a clean kitchen towel. This helps preserve the crust while allowing some airflow.
- Avoid plastic bags, which trap moisture and soften the crust.
Freezing Instructions
- Slice the bread before freezing for easier use.
- Wrap individual slices in plastic wrap, then place them in a freezer-safe bag.
- Bread can be frozen for up to 3 months.
- To thaw, leave slices at room temperature for 15-20 minutes or toast them directly from frozen.
Reheating Instructions
- To restore the crust, place the whole loaf or individual slices in a 350°F (175°C) oven for about 10 minutes.
- For sliced bread, use a toaster or a hot skillet for quick reheating.
Proper storage and reheating help you enjoy every slice with optimal texture and flavor.
Frequently Asked Questions (FAQs)
What makes no-knead bread different from traditional bread?
No-knead bread relies on time and hydration to develop gluten, rather than kneading. This hands-off method makes it accessible to bakers of all experience levels.
Can I use all-purpose flour instead of bread flour?
Yes, but the loaf may have a softer crust and slightly less chew. Bread flour is recommended for better structure.
How do I get a super crispy crust?
- Use a preheated Dutch oven.
- Let the dough bake covered to trap steam.
- Remove the lid for the final 15 minutes to develop color and crispness.
Can I let the dough rise overnight?
Absolutely. An overnight rise in the refrigerator enhances flavor and creates a more complex loaf.
Do I need a Dutch oven to make no-knead bread?
While a Dutch oven is ideal, you can use any heavy, oven-safe pot with a tight-fitting lid. A cast iron pot or ceramic casserole dish can also work.
Why is my no-knead bread too dense?
Common causes include underproofing, adding too much flour, or not allowing the dough to rise fully. Sticky dough is normal — resist the urge to over-flour.
Can I use instant yeast instead of rapid rise yeast?
Yes, but the rise time may be slightly longer. Rapid rise yeast works faster, especially in no-knead recipes.
How do I know if my dough is fully proofed?
The dough should appear puffy and have doubled in size. Lightly press your fingertip into the dough — if the indentation slowly springs back, the dough is ready.
What’s the best way to store homemade bread?
For short-term storage, use a paper bag or bread box. For longer storage, slice and freeze the loaf.
Can I make gluten-free no-knead bread?
Gluten-free flours require different techniques since they lack gluten development. Specialized recipes designed for gluten-free no-knead bread are recommended.
Conclusion
Making Quick and Easy No-Knead Bread at home is an incredibly satisfying experience. With just four basic ingredients and a bit of patience, you can produce a crusty, bakery-style loaf right in your own kitchen — no kneading required. Whether you’re serving it alongside a hearty soup, building a gourmet sandwich, or simply enjoying a warm slice with butter, this bread’s versatility and ease make it a must-try for bakers of all skill levels.
By following these tips, avoiding common mistakes, and exploring creative add-ins, you can customize your loaf to suit your taste. Plus, with simple storage and reheating techniques, you can enjoy fresh, homemade bread any day of the week.
Ready to bake? Grab your flour, yeast, and Dutch oven, and experience the joy of homemade no-knead bread for yourself.
Quick and Easy No-Knead Bread
Ingredients
- 3 cups bread flour
- 1 packet 2 teaspoons rapid rise yeast
- 1 ½ teaspoons salt
- 1 ½ cups warm water
Instructions
Mix the Dough:
- In a large mixing bowl, combine the flour, rapid rise yeast, and salt.
- Add the warm water and mix with a wooden spoon or spatula until a sticky dough forms. (It may look messy—that’s normal!)
Let the Dough Rise:
- Cover the bowl with a damp cloth and let the dough rest in a draft-free place (like a turned-off oven) for 2-3 hours, or until it doubles in volume.
Preheat the Oven:
- A few minutes before the rising time is complete, preheat your oven to 450°F (232°C).
- Place a Dutch oven (with the lid on) in the oven to heat while preheating.
Shape the Dough:
- Lightly sprinkle flour on your countertop and turn the dough out onto it.
- Gently fold the sides of the dough inward about 6 times to form a round loaf. (If the dough sticks to your hands, dust them lightly with flour.)
Transfer to Parchment Paper:
- Use a dough scraper or large knife to transfer the dough onto a piece of parchment paper.
- Leave enough parchment paper hanging over the sides to help lift the bread later.
Bake the Bread:
- Carefully remove the hot Dutch oven from the oven. (It will be very hot!)
- Using the parchment paper, transfer the dough into the Dutch oven. Place the lid on.
- Bake for 30 minutes with the lid on.
- After 30 minutes, remove the lid and bake for another 15 minutes, or until the bread is golden brown.
Cool and Serve:
- Remove the bread from the Dutch oven using the parchment paper.
- Let it cool on a wire rack before slicing.