Jello Pudding Pops are a nostalgic dessert that combines the creamy goodness of instant pudding with the refreshing chill of a popsicle. Originating in the 1980s, these frozen treats were once a store-bought favorite but are now easy to make at home with just a few simple ingredients. This homemade version delivers the same creamy texture and rich flavor as the originals, but with the bonus of customization and clean ingredients.
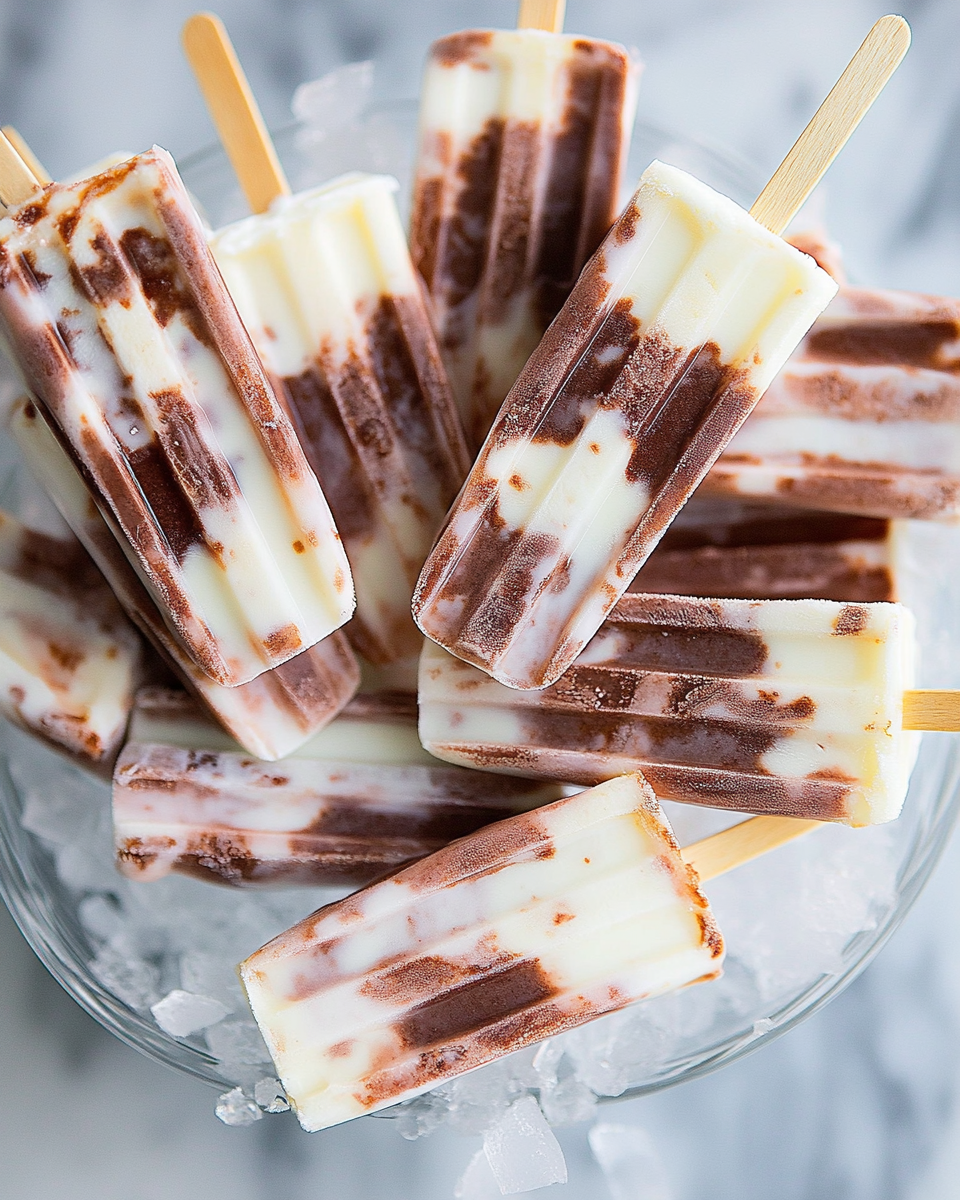
Whether you’re planning a summer gathering, looking for a kid-approved snack, or simply craving a cool treat, Jello Pudding Pops are the answer. They’re smooth, flavorful, and incredibly satisfying—without needing an ice cream machine or complicated steps.
What Makes Jello Pudding Pops Special
Unlike traditional popsicles that are icy and sometimes too hard to bite, pudding pops are known for their creamy texture and rich, custard-like mouthfeel. By using instant pudding and whole milk, you create a frozen dessert that’s both smooth and indulgent.
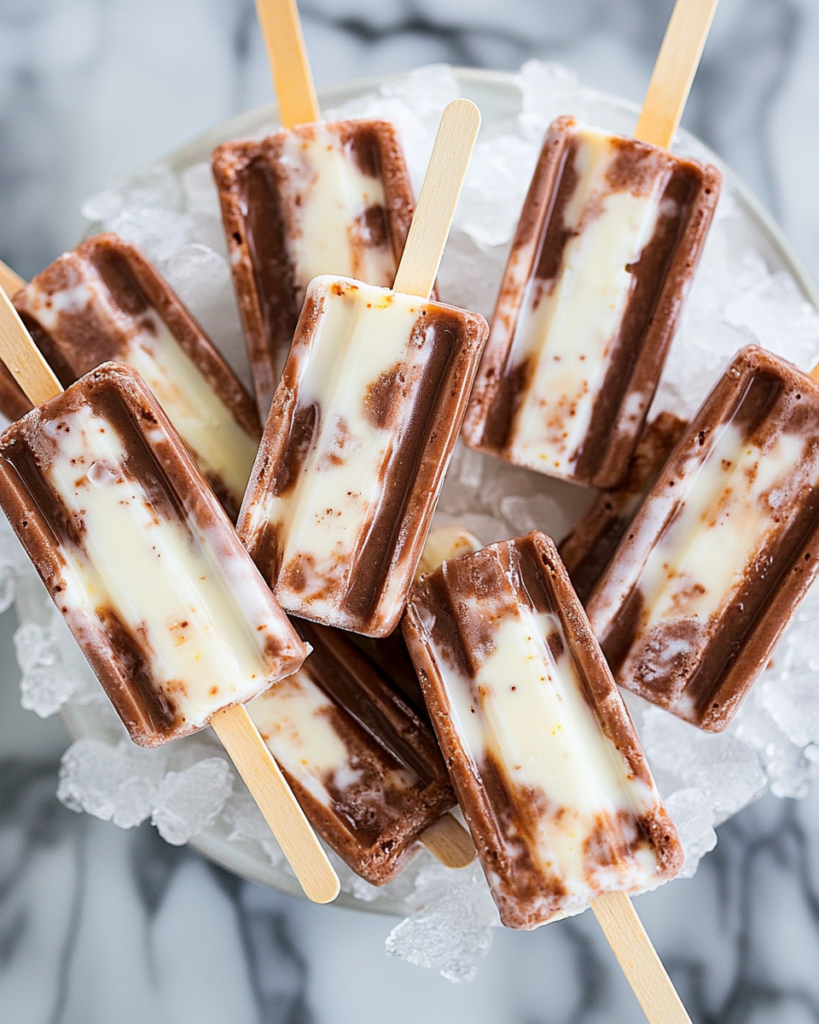
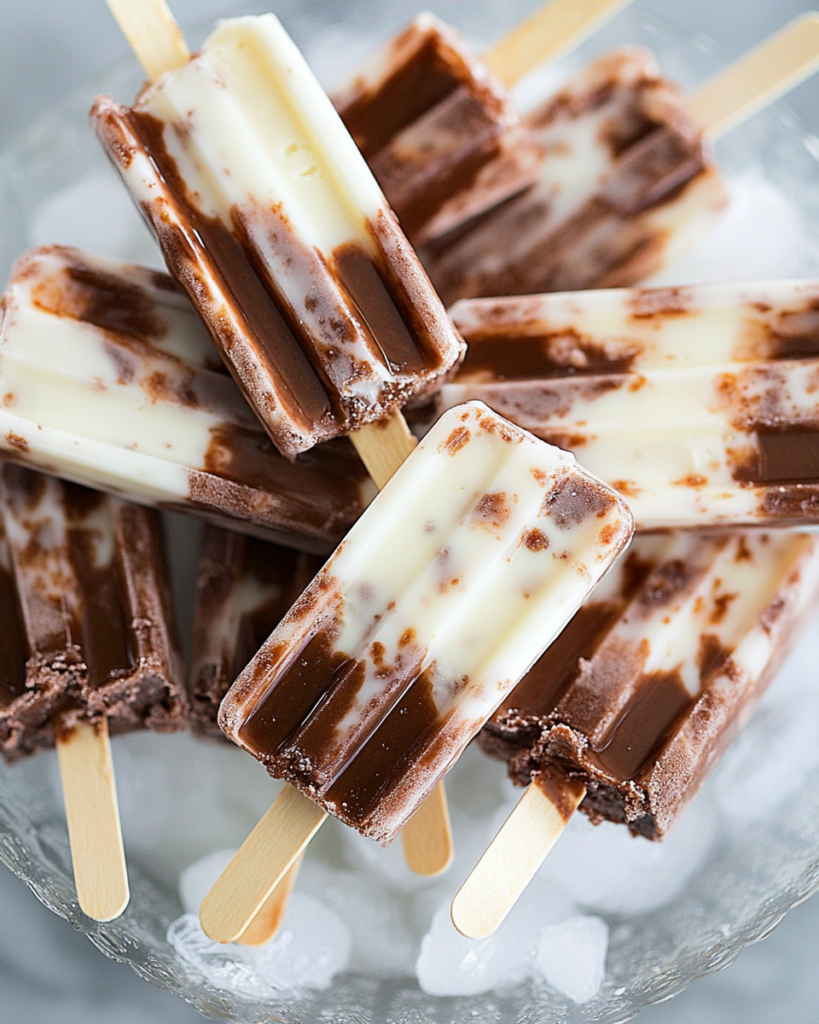
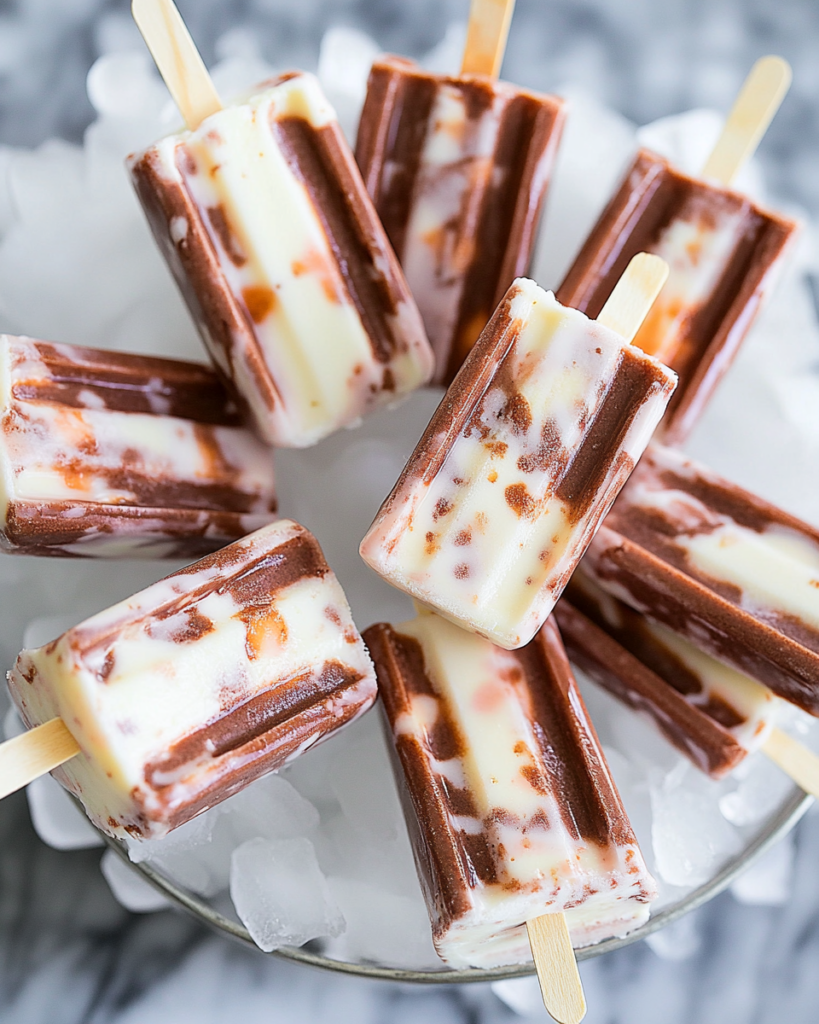
One of the most exciting features of these pudding pops is the swirl of chocolate and white chocolate (or vanilla), creating a beautiful marbled effect. Not only is this visually appealing, but it also gives a delicious contrast of flavors in every bite.
Why You’ll Love This Recipe
- Minimal Ingredients: You only need three ingredients—two pudding mixes and milk.
- Kid-Friendly: Fun to make and even more fun to eat, these are a hit with children.
- Customizable: You can swap flavors, add crushed cookies, or mix in fruit purees.
- No-Bake: No oven or stovetop required. All you need is a freezer.
- Budget-Friendly: Affordable and made with pantry staples.
Preparation Phase & Tools to Use
Before starting, it helps to organize your tools and ingredients. Set out your mixing bowls, measuring cups, whisk, and popsicle molds. It’s also a good idea to clear some space in your freezer so your pops can set undisturbed.
Preparation Tips:
- Use cold milk for quicker setting.
- Let the pudding thicken slightly before filling the molds to avoid a runny mess.
- Use a gallon-size zip-top bag for easy piping and cleaner layering.
Essential Tools and Equipment
To ensure perfect pudding pops, gather the following:
- Mixing bowls: Use one for each pudding flavor.
- Whisk: For smooth, lump-free pudding.
- Measuring cups: For accurate milk measurement.
- Zip-top bag: To pipe the pudding into the molds easily.
- Popsicle molds: Choose molds that hold their shape well and are easy to release.
- Freezer space: Make sure your molds can stand upright while freezing.
Importance of Each Tool
Each tool serves a purpose in making this process smooth and mess-free:
- Mixing bowls keep flavors separate and prevent overmixing.
- A whisk ensures your pudding is smooth and aerated.
- Measuring cups help maintain the ideal pudding-to-milk ratio.
- The zip-top bag allows for controlled piping into molds, especially useful when creating the swirl effect.
- Molds with sticks are essential to forming classic popsicle shapes and making them easy to hold.
Ingredients
- 1 (3.3 oz) box White Chocolate Instant Jell-O Pudding Mix (or vanilla)
- 1 (3.3 oz) box Chocolate Instant Jell-O Pudding Mix
- 3½ cups whole milk, divided
Step-by-Step Instructions
- Prepare the white chocolate pudding:
In a medium mixing bowl, combine the white chocolate pudding mix with 1¾ cups of cold whole milk. Whisk until smooth and let it thicken slightly. - Prepare the chocolate pudding:
In a separate bowl, whisk the chocolate pudding mix with the remaining 1¾ cups of cold whole milk. Allow it to thicken slightly as well. - Fill the zip-top bag:
Spoon alternating dollops of chocolate and white chocolate pudding into a gallon-size zip-top bag. Seal the bag and gently press the mixture toward one bottom corner. - Pipe into molds:
Snip a small corner from the bag and pipe the pudding into the popsicle molds. Alternate pressure to allow the two flavors to swirl as they fill the mold. - Freeze:
Place the molds upright in your freezer and freeze for at least 3 hours, or overnight for best results. - Unmold and serve:
To release the pudding pops, dip the mold bottoms into warm water for a few seconds, then gently pull the pops out.
Variation Tips:
- For added flavor, stir in crushed cookies or mini chocolate chips before piping.
- Try other flavors like banana or butterscotch pudding for new combinations.
Serving Suggestions
Jello Pudding Pops are perfect for hot summer days, backyard gatherings, poolside snacks, or just a quick sweet treat from the freezer. Their creamy texture and fun swirl of chocolate and white chocolate make them visually appealing and satisfying to eat. Here are a few ideas for serving them:
- Birthday parties: Offer a variety of pudding pops with different flavor combinations to keep things exciting.
- After-school snacks: These pops are a wholesome way to cool off after an active afternoon.
- BBQs and cookouts: Serve them in a bucket of ice as a refreshing dessert option.
- Special occasions: Dress them up by dipping the tips in melted chocolate and rolling in sprinkles or crushed cookies.
For extra presentation points, insert the pops into cupcake liners to catch any drips. You can also pre-unmold and display them on a chilled tray for easy access during gatherings.
Common Mistakes to Avoid
Even a simple recipe like Jello Pudding Pops can have pitfalls. Avoid these common mistakes to ensure success every time.
1. Using Sugar-Free Pudding Mixes
Sugar-free versions often do not set the same way as regular pudding. They may result in a thinner consistency that does not freeze into a creamy pop.
2. Substituting Non-Dairy Milk Without Adjustments
Most plant-based milks like almond or oat milk do not contain enough fat or protein to allow the pudding to set correctly. If you need a non-dairy option, consider using full-fat canned coconut milk or a dairy-free pudding mix that is labeled as compatible.
3. Overmixing the Pudding
Over-whisking can cause air bubbles to form, which may lead to inconsistent texture in the finished pop. Whisk just until smooth and allow it to sit until slightly thickened.
4. Not Letting the Pudding Thicken Before Piping
If the pudding is too thin when piped into the molds, it will mix too easily and won’t create the desired swirl effect. Let each bowl sit for a minute or two before combining.
5. Overfilling the Molds
Leave a small amount of space at the top to account for expansion during freezing. Overfilled molds can spill or make it difficult to insert the sticks properly.
How to Perfect the Recipe
Achieving the ideal Jello Pudding Pop is all about controlling the process from mixing to freezing. Follow these tips to get the best results:
- Use whole milk: It provides the richness and fat content necessary for a creamy texture. Skim or low-fat milk can lead to an icy consistency.
- Let puddings partially set: After mixing, give the pudding a few minutes to thicken. This step ensures the swirls hold their shape.
- Use the zip-top bag method: It allows for more precision and less mess when filling the molds.
- Freeze overnight: While they will set in about 3 hours, freezing them overnight helps them become fully solid and easier to unmold.
Consistency in each step leads to uniform, smooth, and beautifully swirled popsicles that taste as good as they look.
Side Dish Recommendations
Pairing Jello Pudding Pops with complementary sides enhances their appeal at events and parties. Here are eight side dishes or additions that go perfectly with these frozen treats:
- Fresh Fruit Salad
The natural sweetness and juiciness of fruits like strawberries, grapes, and kiwi offer a refreshing contrast to the creamy pudding. - Graham Cracker Crumbs
Serve the pops with a side of crushed graham crackers for dipping, adding a crunchy texture. - Coconut Flakes
Lightly toasted coconut flakes add a tropical flavor and extra dimension to the pops. - Mini Marshmallows
Offer a small cup of mini marshmallows for kids to press onto their pudding pop tips. - Chocolate Chips
Dark or semi-sweet chips can be melted and drizzled on top or served on the side for dipping. - Strawberry Puree
Serve a simple, unsweetened strawberry puree as a dipping sauce to add a fruity tartness. - Crushed Oreos
Roll the tips of the pops in crushed Oreos for a cookies-and-cream style twist. - Whipped Cream with Sprinkles
Pipe whipped cream on the side and garnish with colorful sprinkles to turn a simple dessert into a party centerpiece.
Recipe Tips for Success
Mastering Jello Pudding Pops is all about attention to detail and following the process closely. Here are some expert tips to guarantee consistently creamy, well-formed pops:
- Stick to whole milk
Whole milk has the fat content necessary for smooth, creamy pudding. Skim or reduced-fat milk can lead to icy or watery pops. - Let the pudding thicken slightly
After mixing, wait two to three minutes before piping the pudding. This makes the swirl cleaner and the texture firmer when frozen. - Avoid overmixing
Mix until just smooth. Over-whisking can incorporate too much air, which leads to unwanted texture or separation during freezing. - Use a zip-top bag for clean filling
Piping the pudding into the molds gives you better control and reduces mess, especially when creating the swirl effect. - Freeze on a level surface
Make sure your molds stand upright and level in the freezer. Tilting can cause uneven freezing and affect the final shape. - Don’t rush the freeze
While the pudding pops may firm up after three hours, overnight freezing ensures full solidification and a better texture.
Storage and Reheating Instructions
Once your Jello Pudding Pops are frozen solid, storage is simple and keeps them fresh and flavorful.
- Storage Method
You can keep them in the popsicle molds, or remove and wrap each pop individually in plastic wrap or parchment paper. Place the wrapped pops in a zip-top freezer bag to prevent freezer burn and absorb any lingering freezer odors. - How Long They Last
For best quality, enjoy within two to three weeks. After that, texture may begin to degrade, and freezer taste can develop. - Reheating?
These frozen treats do not require reheating. However, if they are too hard to bite right out of the freezer, let them sit at room temperature for one to two minutes before serving. This will soften the texture just enough without melting them.
Frequently Asked Questions
Can I use almond milk or oat milk instead of whole milk?
You can, but the texture will likely be less creamy and the pudding may not set correctly. If you’re dairy-free, use a thicker milk alternative like canned coconut milk or look for instant pudding mixes that are specifically labeled as compatible with plant-based milks.
How long do pudding pops take to freeze?
At a minimum, allow three hours. For best results, freeze overnight to ensure they are completely solid and hold their shape when unmolded.
Can I make these without popsicle molds?
Yes. Use small paper cups or silicone baking molds. Insert wooden sticks halfway through freezing so they stay upright. When ready, peel or cut away the cup.
How do I prevent the pudding pops from becoming icy?
Using whole milk helps prevent iciness. Make sure not to incorporate too much air during mixing. Let the pudding thicken slightly before freezing, and wrap pops individually after unmolding to avoid freezer burn.
Can I make these with other pudding flavors?
Absolutely. Banana, butterscotch, cookies and cream, or even pistachio pudding can be used for variety. You can also layer or swirl multiple flavors for added fun.
Are pudding pops safe for young kids to make?
With adult supervision, yes. The process involves no heat and very little risk. Kids can help with mixing, filling, and adding decorations, making this a great family activity.
Can I dip these in chocolate?
Yes. Once unmolded, dip the tops into melted chocolate and immediately roll in crushed nuts, sprinkles, or cookie crumbs. Place them back in the freezer briefly to harden the chocolate coating.
Conclusion
Jello Pudding Pops are the perfect blend of nostalgia and simplicity. They bring together the rich, creamy flavor of pudding and the cooling satisfaction of a frozen dessert, all without needing an oven or stovetop. Whether you’re making them for a summer event, a birthday celebration, or just a personal treat, these pops deliver consistent flavor and fun.
Their simplicity, affordability, and adaptability make them ideal for families, parties, or anytime you want a quick frozen dessert. Try experimenting with flavors, mix-ins, and toppings to make them your own. With just a few pantry staples and some freezer space, you’ll have a sweet treat ready to cool you down and satisfy your cravings.
Jello Pudding Pops
Ingredients
- 1 3.3 oz box White Chocolate Instant Jell-O Pudding Mix (or vanilla)
- 1 3.3 oz box Chocolate Instant Jell-O Pudding Mix
- 3½ cups whole milk divided
Instructions
- In one medium bowl, whisk together the white chocolate pudding mix with 1¾ cups of milk until smooth. Let it thicken slightly.
- In another medium bowl, whisk together the chocolate pudding mix with the remaining 1¾ cups of milk. Let it thicken slightly as well.
- Once both puddings are beginning to set, spoon alternating scoops of each pudding into a gallon-size zip-top bag. Seal the bag and snip one of the corners.
- Pipe the pudding mixture into popsicle molds, allowing the two flavors to swirl together as you fill them.
- Freeze for at least 3 hours, or overnight for best results.
- To remove the pudding pops from the molds, dip the bottoms of the molds in hot water for a few seconds until the pops slide out easily.