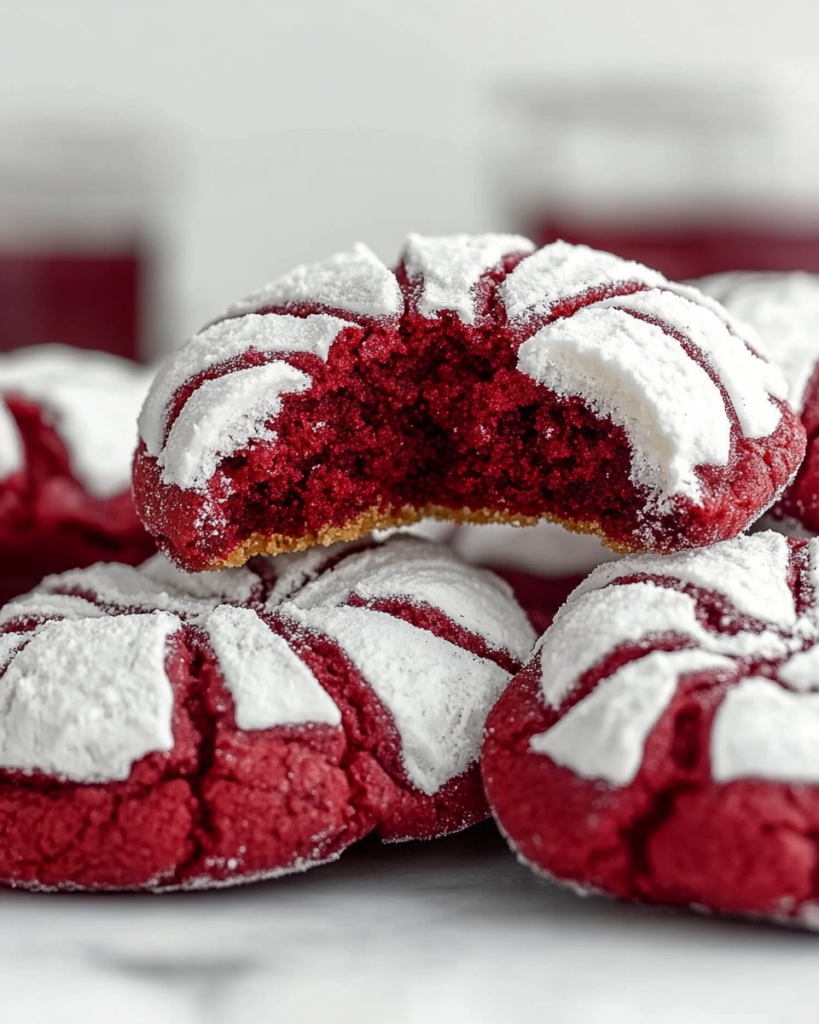
A classic dessert with a festive twist, Red Velvet Crinkle Cookies combine rich cocoa flavor with a hint of vanilla, all wrapped in a delicate powdered sugar coating. These cookies have a soft, chewy texture with a crisp outer layer, making them a perfect treat for holidays, parties, or everyday indulgence.
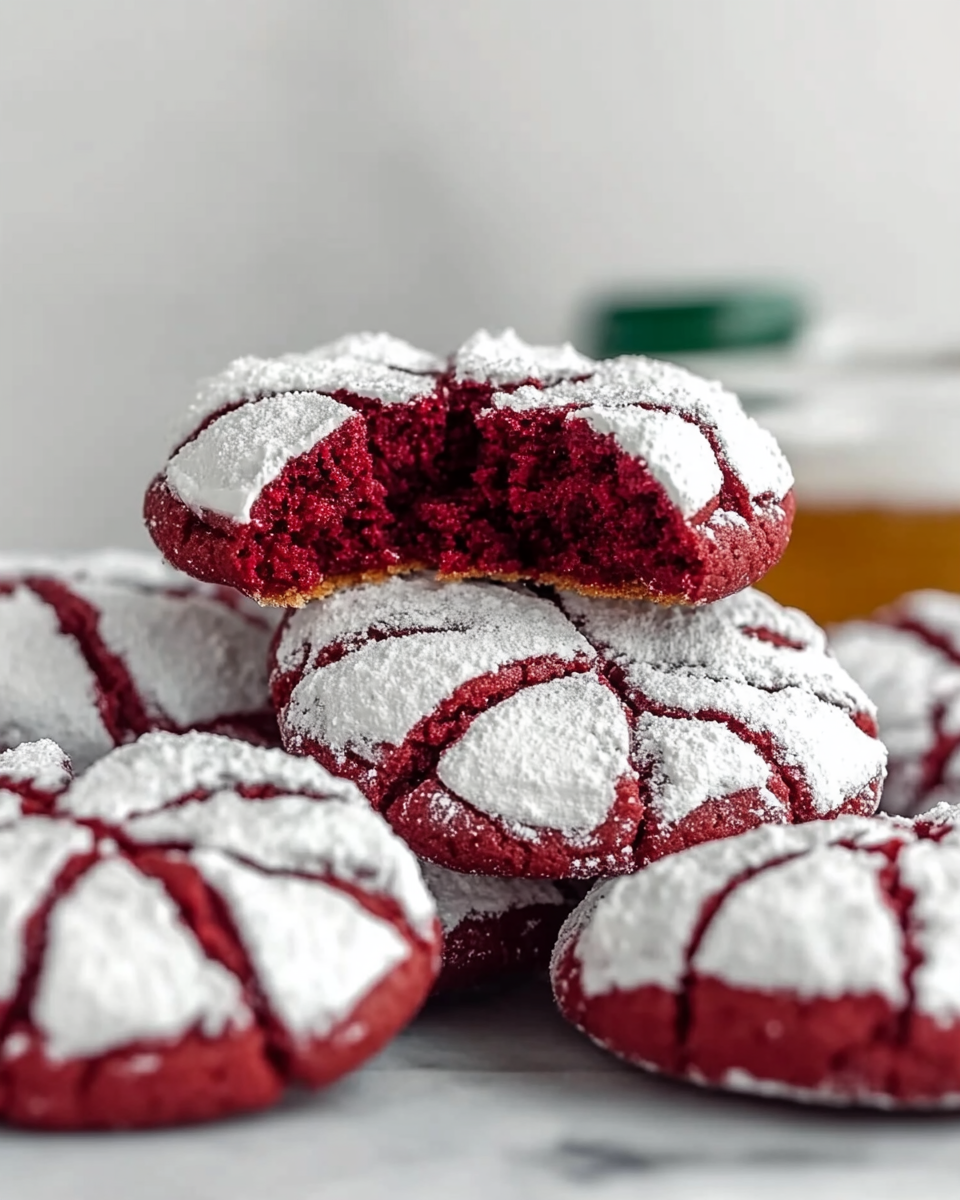
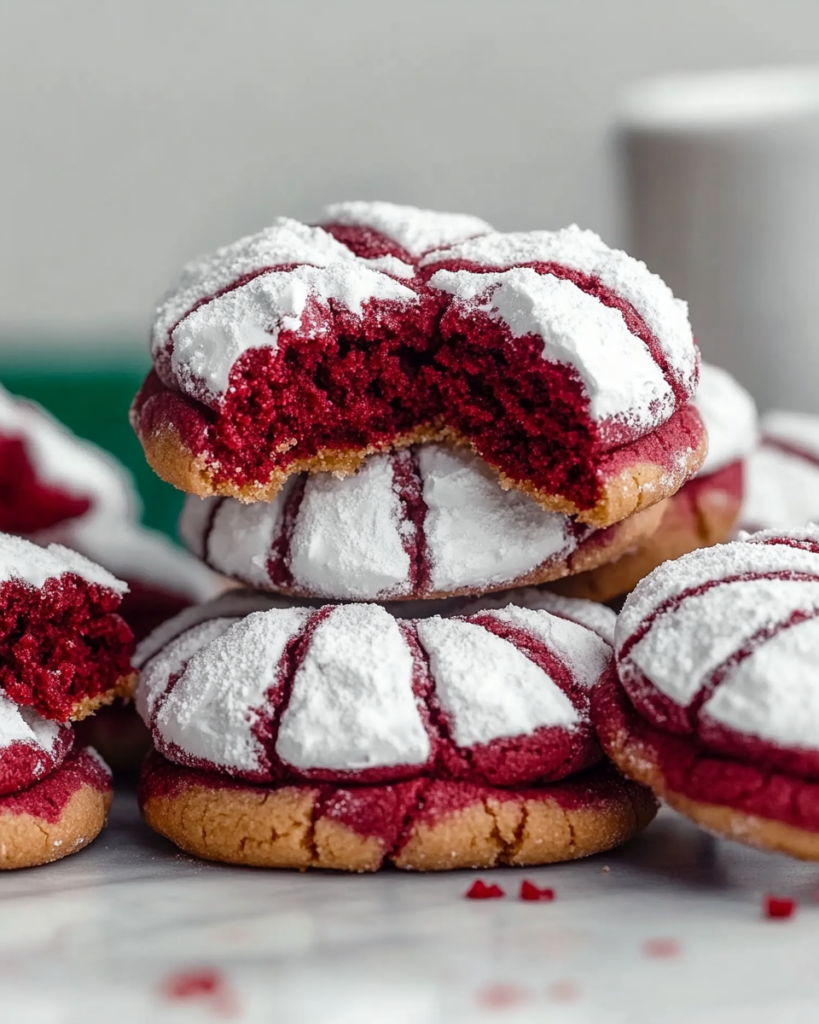
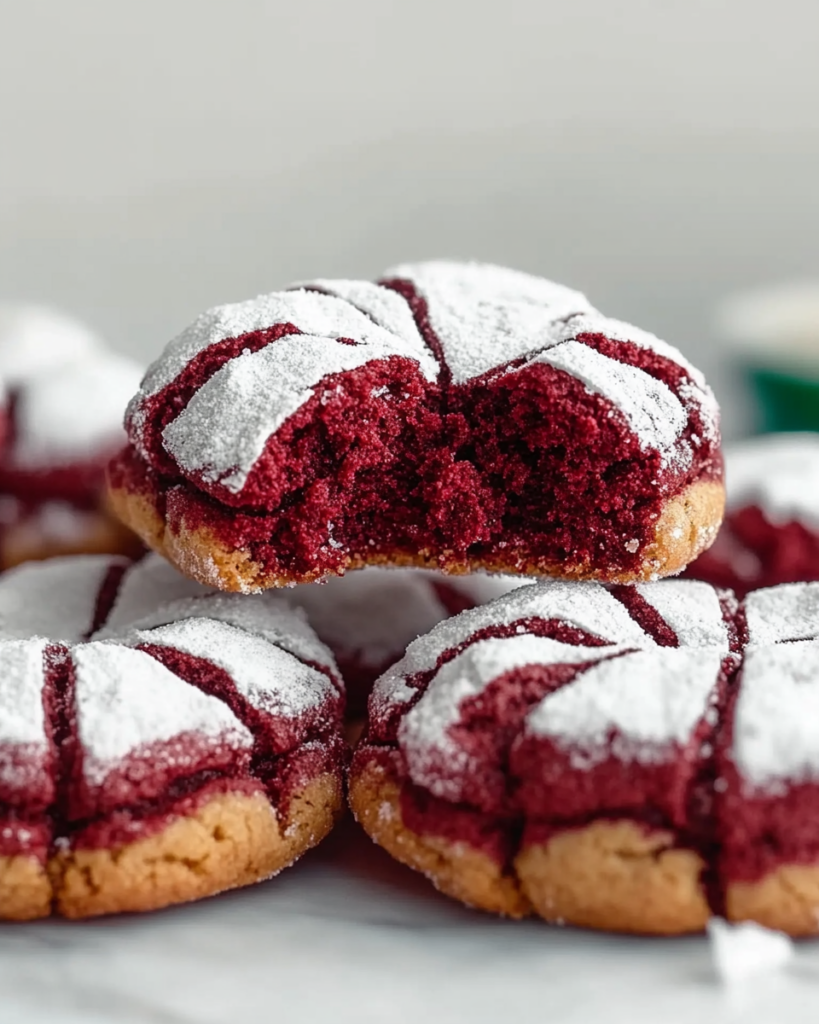
Their signature crinkle effect forms as they bake, creating beautiful cracks that reveal the vibrant red interior. With just the right balance of sweetness and chocolatey depth, these cookies are a crowd-pleaser for all ages.
Why You’ll Love This Recipe
- Perfectly Soft & Chewy: A slightly crisp exterior contrasts beautifully with a moist, tender center.
- Beautiful Crinkle Effect: The powdered sugar coating creates striking cracks as the cookies bake.
- Easy to Make: Simple ingredients and straightforward steps make this an approachable recipe for any baker.
- Great for Any Occasion: Ideal for holiday baking, Valentine’s Day, or a casual sweet treat.
- Customizable: Easily adapt the recipe with different food coloring shades or mix-ins like white chocolate chips.
Preparation Phase & Tools to Use
Essential Tools & Equipment
- Mixing Bowls: One for dry ingredients, another for wet ingredients.
- Electric Mixer or Whisk: Helps achieve a light, fluffy butter-sugar mixture.
- Measuring Cups & Spoons: Ensures accurate ingredient proportions.
- Baking Sheets & Parchment Paper: Prevents sticking and promotes even baking.
- Cookie Scoop (Optional): Helps create uniform cookies.
- Wire Rack: Allows cookies to cool evenly.
Preparation Tips
- Use Room Temperature Butter: Softened butter blends more easily with sugar, creating a smooth dough.
- Chill the Dough: Refrigerating the dough for at least 30 minutes prevents excessive spreading and enhances the crinkle effect.
- Generously Coat in Powdered Sugar: A thick layer of powdered sugar gives the best visual contrast after baking.
Ingredients
Dry Ingredients:
- 1 ½ cups all-purpose flour
- ½ cup unsweetened cocoa powder
- 1 teaspoon baking powder
- ¼ teaspoon salt
Wet Ingredients:
- ½ cup unsalted butter, softened
- 1 cup granulated sugar
- 2 large eggs
- 1 teaspoon vanilla extract
- 1 tablespoon red food coloring
For Rolling:
- ½ cup powdered sugar
Step-by-Step Directions
1. Preheat the Oven
- Preheat oven to 350°F (175°C).
- Line two baking sheets with parchment paper and set aside.
2. Prepare the Dry Ingredients
- In a medium bowl, whisk together:
- Flour
- Cocoa powder
- Baking powder
- Salt
3. Mix the Wet Ingredients
- In a large mixing bowl, beat softened butter and granulated sugar until light and fluffy (about 2–3 minutes).
- Add eggs one at a time, beating well after each addition.
- Mix in vanilla extract and red food coloring until evenly incorporated.
4. Combine the Mixtures
- Gradually add the dry ingredients to the wet ingredients, stirring until just combined.
- The dough will be soft and slightly sticky.
5. Chill the Dough
- Cover and refrigerate for at least 30 minutes.
- Chilling helps prevent excessive spreading and enhances the crinkle effect.
6. Shape & Coat
- Scoop 1-inch dough balls using a spoon or cookie scoop.
- Roll each ball generously in powdered sugar, ensuring full coverage.
- Place on the prepared baking sheets, spacing 2 inches apart.
7. Bake
- Bake for 10–12 minutes, or until the cookies are set but still soft in the center.
- They should have a distinctive crinkled surface.
8. Cool & Serve
- Let cookies cool on the baking sheet for a few minutes before transferring them to a wire rack.
- Serve once completely cooled.
Serving Suggestions
Red Velvet Crinkle Cookies are a delightful treat that can be enjoyed on their own or paired with various accompaniments to enhance their flavor. Here are a few ways to serve them:
- Classic with Milk – A tall glass of cold milk complements the rich cocoa flavor and soft texture of these cookies.
- Drizzled with White Chocolate – Melted white chocolate adds an extra layer of sweetness and enhances the red velvet theme.
- With a Scoop of Ice Cream – Pairing these cookies with vanilla or cream cheese-flavored ice cream creates a rich and creamy contrast.
- Sandwich Cookies – Spread a layer of cream cheese frosting between two cookies for a decadent dessert.
- Dipped in Hot Chocolate – The combination of warm, creamy hot chocolate and these cookies makes for a cozy treat.
- With Fresh Berries – The slight tartness of raspberries or strawberries balances the sweetness of the cookies.
- Crumbled Over Yogurt or Parfaits – Use cookie crumbles as a topping for yogurt, adding texture and flavor.
Common Mistakes & How to Avoid Them
Even with a straightforward recipe, certain mistakes can affect the final outcome. Here are some common errors and ways to prevent them:
1. Not Chilling the Dough
Mistake: Skipping the chilling step can cause the dough to spread too much, resulting in flat cookies with minimal cracks.
Solution: Refrigerate the dough for at least 30 minutes to ensure the cookies hold their shape and develop the crinkle effect.
2. Using Too Little Powdered Sugar
Mistake: A light dusting of powdered sugar won’t create a strong visual contrast after baking.
Solution: Coat the dough balls generously in powdered sugar to get a dramatic crinkle effect.
3. Overmixing the Dough
Mistake: Overworking the dough can make the cookies dense and tough.
Solution: Mix just until the dry and wet ingredients are combined to maintain a soft texture.
4. Overbaking the Cookies
Mistake: Baking for too long results in dry, hard cookies.
Solution: Remove the cookies from the oven when the edges are set but the centers still look slightly soft. They will continue to firm up as they cool.
5. Using the Wrong Type of Food Coloring
Mistake: Liquid food coloring may not provide a deep red hue.
Solution: Use gel or paste food coloring for a more vibrant color without adding excess liquid to the dough.
6. Not Allowing the Cookies to Cool Properly
Mistake: Moving the cookies too soon can cause them to break apart.
Solution: Let them cool on the baking sheet for a few minutes before transferring them to a wire rack.
Side Dish Recommendations
Although Red Velvet Crinkle Cookies are a dessert, they pair well with a variety of complementary flavors and drinks. Here are eight great options:
1. Hot Coffee or Espresso
The slight bitterness of coffee balances the sweetness of the cookies, making for a well-rounded pairing.
2. Vanilla Ice Cream
A scoop of creamy vanilla ice cream enhances the richness of the cookies and creates a cool contrast.
3. Whipped Cream & Berries
A light dollop of whipped cream with fresh raspberries or strawberries adds a refreshing balance to the dense texture of the cookies.
4. Mint Tea
A warm cup of mint tea helps cleanse the palate and balances the chocolatey undertones of the cookies.
5. Chocolate Fondue
Dipping the cookies in a rich chocolate fondue adds an indulgent touch and enhances their cocoa flavor.
6. Cheesecake
The tangy, creamy texture of cheesecake pairs perfectly with the sweet, chewy cookies, creating a decadent dessert combination.
7. Strawberry Milkshake
A thick strawberry milkshake complements the red velvet theme and adds a fruity twist.
8. Spiced Apple Cider
The warm spices in apple cider contrast beautifully with the rich chocolate notes in the cookies, making this a great option for fall or winter.
These serving ideas, pairing options, and troubleshooting tips will help you make the most of your Red Velvet Crinkle Cookies while avoiding common mistakes. Whether served with a warm drink, fresh fruit, or a scoop of ice cream, these cookies are sure to be a hit.
Recipe Tips
To achieve the best Red Velvet Crinkle Cookies, keep these tips in mind:
- Use High-Quality Cocoa Powder – The richness of the cookies depends on the cocoa you use. Opt for a high-quality unsweetened cocoa powder for the best flavor.
- Measure Ingredients Accurately – Too much flour can make the cookies dry, while too little can make them spread too much. Use the spoon-and-level method to measure flour correctly.
- Do Not Overbake – The cookies should be slightly soft in the center when removed from the oven. Overbaking will make them dry and crumbly.
- Let the Dough Rest in the Fridge – Refrigerating the dough for at least 30 minutes prevents spreading and enhances the crinkle effect.
- Ensure an Even Powdered Sugar Coating – Roll each dough ball generously in powdered sugar to create a striking contrast when the cookies bake.
Storage & Reheating Instructions
Storing the Cookies
Proper storage keeps the cookies fresh and maintains their soft texture:
- Room Temperature: Store in an airtight container at room temperature for up to 5 days. Place parchment paper between layers to prevent sticking.
- Refrigeration: While not necessary, you can refrigerate the cookies for up to 1 week. Let them sit at room temperature for a few minutes before serving.
- Freezing Baked Cookies: Place cooled cookies in a single layer on a baking sheet and freeze until firm. Transfer them to a freezer-safe bag or container and store for up to 3 months.
- Freezing the Dough: Scoop dough balls onto a lined baking sheet and freeze until solid. Once frozen, transfer them to a freezer bag. When ready to bake, roll in powdered sugar and bake as directed, adding 1–2 extra minutes.
Reheating the Cookies
If you prefer warm cookies, you can easily reheat them:
- Microwave: Heat one cookie at a time for 5–10 seconds to soften slightly.
- Oven: Warm at 300°F (150°C) for 5 minutes to restore their fresh-baked texture.
FAQs
1. Why didn’t my cookies crinkle properly?
If the dough was too warm or the powdered sugar coating was too light, the crinkle effect may not form well. Always chill the dough and generously coat each ball in powdered sugar.
2. Can I make these cookies without food coloring?
Yes, you can skip the food coloring, though the cookies will have more of a chocolate-brown color rather than the signature red velvet look.
3. Can I use a different type of sugar for rolling?
Powdered sugar is best for achieving the crinkle effect, but you can also mix it with a little cornstarch for an even better crackled texture.
4. Can I make this recipe gluten-free?
Yes, substitute all-purpose flour with a 1:1 gluten-free flour blend for a gluten-free version. The texture may be slightly different, but the cookies will still be delicious.
5. How do I make the cookies more chocolatey?
Increase the cocoa powder to ¾ cup and reduce the flour slightly to maintain the right dough consistency. Adding chocolate chips can also enhance the flavor.
6. Can I make the dough ahead of time?
Yes, you can refrigerate the dough for up to 24 hours before baking. If it becomes too firm, let it sit at room temperature for a few minutes before rolling into balls.
7. Why did my cookies turn out dry?
Overbaking is the most common reason for dry cookies. Remove them from the oven when the centers are still soft, as they will continue to set as they cool.
8. Can I add mix-ins to this recipe?
Absolutely. Try adding white chocolate chips, chopped nuts, or a pinch of espresso powder to enhance the flavor.
Conclusion
Red Velvet Crinkle Cookies are a perfect combination of soft, chewy texture and rich chocolate flavor, all coated in a beautiful crinkled powdered sugar layer. By following the right techniques, avoiding common mistakes, and storing them properly, you can enjoy these cookies fresh for days. Whether served with coffee, ice cream, or as part of a dessert platter, these cookies are sure to be a favorite for any occasion.
Red Velvet Crinkle Cookies
Ingredients
Dry Ingredients:
- 1 ½ cups all-purpose flour
- ½ cup unsweetened cocoa powder
- 1 teaspoon baking powder
- ¼ teaspoon salt
Wet Ingredients:
- ½ cup unsalted butter softened
- 1 cup granulated sugar
- 2 large eggs
- 1 teaspoon vanilla extract
- 1 tablespoon red food coloring
For Rolling:
- ½ cup powdered sugar
Instructions
Preheat the Oven
- Preheat oven to 350°F (175°C).
- Line two baking sheets with parchment paper and set aside.
Prepare the Dry Ingredients
- In a medium bowl, whisk together the flour, cocoa powder, baking powder, and salt.
Mix the Wet Ingredients
- In a large mixing bowl, beat the softened butter and granulated sugar until light and fluffy, about 2–3 minutes.
- Add the eggs one at a time, beating well after each addition.
- Mix in the vanilla extract and red food coloring until evenly combined.
Combine the Mixtures
- Gradually add the dry ingredients to the wet ingredients, mixing just until combined.
- The dough will be soft and slightly sticky.
Chill the Dough
- Cover and refrigerate for at least 30 minutes. This helps make the dough easier to handle and prevents excessive spreading.
Shape and Coat
- Scoop chilled dough into 1-inch balls.
- Roll each ball generously in powdered sugar, coating completely.
- Place on the prepared baking sheets, leaving 2 inches of space between them.
Bake
- Bake for 10–12 minutes, until the cookies are set but still soft in the center.
- They should have a distinctive crackled top.
Cool and Serve
- Let the cookies cool on the baking sheet for a few minutes before transferring to a wire rack to cool completely.